Proper tent setup is essential for ensuring safety, comfort, and durability. Follow the manual carefully to assemble components correctly, ensuring a secure and weather-tight structure for outdoor adventures.
Why Proper Tent Setup is Important
Proper tent setup ensures safety, stability, and comfort during outdoor adventures. A well-assembled tent provides protection from weather conditions, such as rain and wind, and prevents structural damage. Improper setup can lead to leaks, torn fabric, or even collapse, compromising safety. Following the manufacturer’s instructions guarantees a secure and durable shelter, enhancing the camping experience. Additionally, correct assembly prevents unnecessary wear and tear, extending the tent’s lifespan. Always prioritize careful setup to ensure a safe, dry, and enjoyable stay in nature.
Overview of Tent Components
A typical tent consists of several key components designed to work together for stability and protection. The tent poles form the structural frame, connecting to the tent fabric via clips or sleeves. Stakes and ropes secure the tent to the ground, while guylines provide additional stability. The rainfly offers extra waterproof protection, and doors and windows allow for ventilation and entry/exit. Some tents include a ground tarp for added moisture protection. Understanding each component’s role is crucial for proper assembly and functionality. Always ensure all parts are accounted for before setup to avoid delays or issues.

Pre-Setup and Site Preparation
Select a level, debris-free site and lay a tarp for ground protection. Organize all tent components and ensure the area is clear before beginning assembly for a smooth setup process.
Choosing the Right Campsite
Selecting the right campsite is crucial for a safe and enjoyable experience. Look for a flat, dry area free from rocks, branches, and other sharp objects that could damage your tent. Avoid low-lying spots where water may pool during rain. Ensure the site is level to prevent uneven tent floors and potential structural issues. Choose a location with natural shelter from wind and direct sunlight to enhance comfort. If camping near water, keep a safe distance to avoid moisture seeping into the tent. Always check local regulations and campground rules before setting up. A well-chosen site ensures proper drainage, stability, and protection from the elements, making your tent setup more secure and comfortable. Remember, a good campsite lays the foundation for a successful outdoor adventure.
Laying a Tarp for Ground Protection
Laying a tarp is a critical step in tent setup to protect the tent floor from moisture, abrasion, and dirt. Begin by selecting a tarp slightly smaller than your tent’s footprint to prevent water from pooling around the edges. Place the tarp on a clean, debris-free area, ensuring it is centered and evenly spread. Smooth out any wrinkles or air pockets to create a flat surface. Secure the tarp’s edges with rocks or weights if necessary, but avoid overlapping or bunching. Once the tarp is in place, unfold your tent and align it with the tarp’s edges; This layer of protection not only extends the life of your tent but also makes cleanup easier. Always ensure the tarp is dry and free of sharp objects to prevent damage to the tent’s bottom. Properly laying a tarp is essential for a dry and comfortable camping experience.
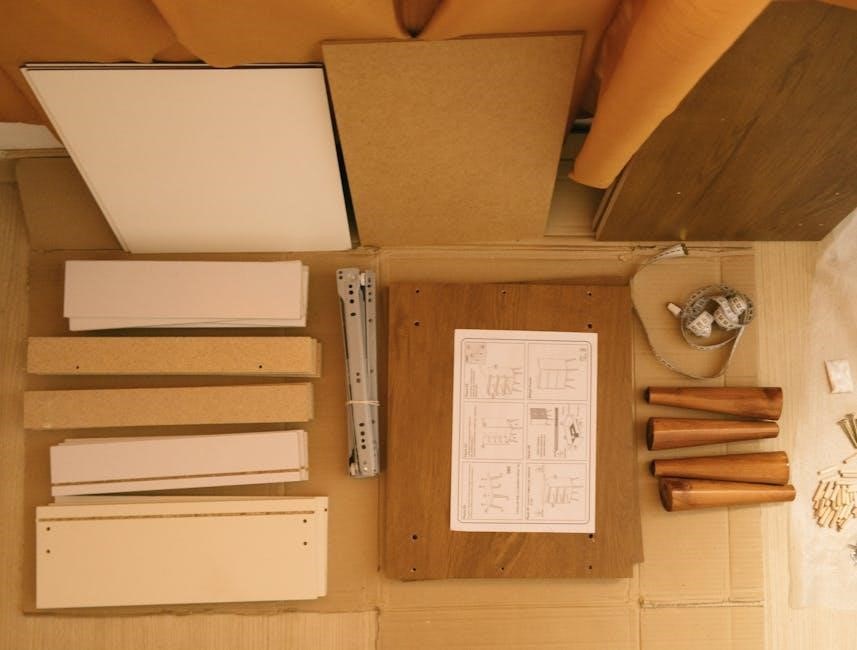
Unpacking and Organizing Tent Components
Unpacking and organizing tent components is the first step in a successful setup. Carefully remove all items from the storage bag, including poles, stakes, ropes, and the tent fabric. Lay out each component on a clean, dry surface to ensure nothing is missing or damaged. Check for pole sections, connectors, and any additional hardware like grommets or eyelets. Separate the tent fabric from the poles to avoid tangling. Count the number of stakes and ropes to match the quantities listed in the manual. Organize poles by length and type, and group ropes by size and color for easy identification. This systematic approach prevents confusion and ensures all parts are accounted for before assembly begins. Proper organization saves time and reduces the risk of missing or misplaced items, making the setup process more efficient and stress-free.

Assembly and Installation
Securely attach poles to the tent frame, ensuring proper alignment and stability. Install doors and windows, then stake the tent firmly into the ground for a safe setup.
Attaching Tent Poles to the Frame
Start by unfolding the tent and laying it flat on a clean, dry surface. Locate the pole sleeves, which are usually sewn into the tent fabric. Take the first pole and insert one end into the corresponding sleeve, ensuring it aligns with the tent’s frame. Gently push the pole through the sleeve until it clicks into place. Repeat this process for each pole, making sure they are fully seated and the tent begins to take shape. Use the provided connectors or clips to secure the poles to the frame, following the manufacturer’s instructions. Tighten any bolts or screws firmly to ensure stability. If the poles are color-coded or labeled, match them accordingly to avoid confusion. Handle the poles carefully to prevent bending or damage, especially when attaching them to the frame. Once all poles are securely attached, the tent should stand upright, ready for further installation steps like staking and tensioning ropes. Properly attaching the poles ensures the tent’s structural integrity and makes the rest of the setup process smoother. Always refer to the manual for specific guidance, as different tent models may have unique attachment methods. By following these steps, you’ll have a sturdy and reliable shelter for your outdoor adventures. Avoid using excessive force, as this could damage the poles or the tent fabric. If you encounter any difficulties, double-check the manual or consult with a camping expert for assistance. Remember, patience and attention to detail are key to a successful tent setup. Once the poles are correctly attached, you’ll be one step closer to enjoying your camping experience in a safe and comfortable environment. Keep all tools and accessories nearby to streamline the process and ensure everything is within reach. Finally, inspect the poles and frame connections to make sure they are secure before moving on to the next steps, such as installing doors and windows or securing the tent with stakes and ropes. Taking the time to properly attach the tent poles will significantly enhance the overall stability and durability of your shelter, providing peace of mind during your stay outdoors. Always prioritize correct assembly to ensure your tent performs optimally in various weather conditions; With careful attention, your tent will remain a reliable and comfortable haven for years to come.
Installing Tent Doors and Windows
After securing the tent frame, focus on installing the doors and windows. Begin by aligning the door with the designated doorway area, ensuring the Velcro strips or hooks match up with the tent fabric. Gently press the door into place, making sure it adheres securely. For zippered doors, slide the zipper into its track and pull it up to close. Repeat this process for any additional doors or windows, ensuring they are properly aligned and fastened. Some tents may require attaching windows using hooks or clips; follow the manual for specific guidance; Once installed, test the doors and windows by opening and closing them to ensure smooth operation. Proper installation ensures ventilation, light, and easy access to the tent. If your tent has roll-up windows, secure them with ties or straps when open. For models with rain flaps, attach them to the door frames to prevent water ingress. Always refer to the manual for model-specific instructions, as attachment methods may vary. Correct installation enhances the tent’s functionality and comfort, ensuring a weather-tight and secure shelter. Take your time to align and fasten each component accurately, as improper installation can lead to gaps or damage. By following these steps, you’ll achieve a well-ventilated and accessible camping shelter tailored to your needs. Remember to double-check all attachments before finalizing the setup. Properly installed doors and windows not only improve comfort but also extend the tent’s durability. Always handle the fabric gently to avoid tears or damage during installation. With careful attention, your tent will provide reliable protection and convenience during your outdoor adventures. Ensure all zippers and hooks are in good condition for optimal performance. If any issues arise, consult the manual or contact the manufacturer for assistance. A correctly installed door and window system ensures a pleasant and secure camping experience.
Securing the Tent with Stakes and Ropes
To ensure your tent remains stable and secure, proper use of stakes and ropes is crucial. Begin by locating the stake-out points on the tent corners and sides, typically marked with loops or tabs. Insert stakes into the ground at a 45-degree angle, ensuring they are driven in fully to prevent shifting. For ropes, attach them to the tent’s tie-out points and tighten gradually, working around the tent to maintain even tension. Use a mallet to secure stakes firmly, especially in hard ground. For added stability, tie ropes to nearby anchors like trees or rocks if possible. After securing, walk around the tent to check for loose areas and tighten as needed. Seasonal considerations, such as snowy or windy conditions, may require additional stakes or heavier-duty ropes. Always refer to the manual for specific guidance on securing your tent model effectively. Properly securing the tent ensures safety and prevents damage from wind or rain. Regularly inspect stakes and ropes for wear and replace them as needed. Tightening ropes evenly is key to avoiding uneven stress on the tent fabric. By following these steps, you’ll achieve a stable and secure shelter for your outdoor adventures. Remember to double-check all stakes and ropes before finalizing the setup. A well-secured tent provides peace of mind and protection from harsh weather conditions. Always handle ropes and stakes with care to avoid damage to the tent or surrounding environment. For optimal stability, ensure the tent is pitched on level ground and all components are tightly fastened. If unsure, consult the manual or seek guidance from experienced campers. Proper securing ensures a safe and enjoyable camping experience.

Specific Tent Types
Tent types vary, including family, party, and rooftop models. Each requires specific setup steps outlined in their manuals. Choose the right tent for your needs and follow instructions carefully.
Setting Up a Family Tent
Setting up a family tent typically begins with selecting a flat, clear site. Lay down a tarp for ground protection and unpack all components. Attach poles to the frame, ensuring they are fully extended and securely connected. Follow the manual’s step-by-step instructions to avoid confusion. Once the tent is partially erected, use stakes to anchor the corners and guy lines to tighten the fabric. Ensure all doors and windows are properly installed and secured. Double-check that all poles are firmly attached and the tent is stable before finalizing. Always refer to the manufacturer’s guidelines for specific details, as different models may have unique features or requirements. Proper setup ensures safety and comfort for all occupants during outdoor adventures.
Installing a Party Tent
Installing a party tent requires careful planning and execution to ensure stability and safety. Begin by selecting a flat, open site and laying a tarp for ground protection. Unpack all components, including poles, stakes, and ropes, and organize them according to the manual. Attach the tent poles to the frame, ensuring they are fully extended and securely locked. Next, stand the tent upright and connect the roof fabric, tightening it evenly. Use stakes to anchor the corners and guy lines to tension the sides, ensuring the tent is taut and stable. For larger tents, consider adding sidewalls for additional shelter and privacy. Always follow the manufacturer’s instructions for specific assembly details, as party tents often have unique features. Double-check all connections and ensure the tent is securely fastened to withstand wind and weather conditions. Proper installation ensures a safe and enjoyable event for all attendees.
Maintenance and Care
Regular cleaning and proper storage extend your tent’s lifespan. Avoid harsh chemicals and moisture buildup. Handle poles carefully to prevent damage. Inspect for wear and tear after each use.
Cleaning the Tent Fabric
Regular cleaning is essential to maintain the tent’s fabric and prevent damage. Start by brushing off loose dirt and debris. For more thorough cleaning, mix mild soap with warm water and gently scrub the fabric with a soft sponge or brush. Avoid harsh chemicals or abrasive cleaners, as they can damage waterproof coatings or tear the material. Rinse thoroughly with clean water to remove soap residue. For stubborn stains, apply a fabric-specific cleaner and rinse immediately. Allow the tent to air dry completely before storage to prevent mildew. Never machine wash or dry your tent, as this can cause irreparable damage. Always refer to the manufacturer’s cleaning instructions for specific guidance tailored to your tent’s materials.

Storing the Tent Properly
Proper storage is crucial to maintain the tent’s condition and longevity. Always clean and dry the tent thoroughly before storing to prevent mildew and mold. Store the tent in a cool, dry place away from direct sunlight. Use a breathable storage bag or sack to allow airflow and avoid condensation. Never store the tent in a damp or humid environment, as this can damage the fabric and cause mildew. Avoid folding the tent tightly for extended periods, as this can create permanent creases or weaken the material. Instead, store it loosely or roll it up to minimize stress on the fabric. Ensure all poles, stakes, and accessories are stored separately in labeled bags for easy access. Regularly inspect the tent before and after storage to identify and address any potential issues early. Proper storage ensures your tent remains in excellent condition for future use.
Troubleshooting Common Issues
Address common issues like leaks, tears, or broken poles by using patch kits or fabric repair kits. Replace damaged poles promptly and ensure the tent is clean and securely staked to prevent further problems.
Dealing with Leaks and Tears
Addressing leaks and tears promptly is crucial to maintain your tent’s integrity. Start by identifying the source of the leak or tear. For small tears, apply a patch kit or fabric repair tape to prevent further damage. For leaks, inspect the seams and apply a waterproof sealant if necessary. Regularly inspect your tent for signs of wear and tear, especially after harsh weather conditions. Store your tent in a dry, clean environment to prevent mold and mildew, which can weaken the fabric. Always follow the manufacturer’s instructions for repairs and maintenance. If the damage is extensive, consider consulting a professional or replacing the tent. Proper care and timely repairs will extend the lifespan of your tent and ensure it remains reliable for future use.
Fixing Broken Poles or Joints
If a tent pole or joint breaks, address the issue immediately to maintain structural integrity. Start by carefully removing the broken section to prevent further damage. If a pole is bent or snapped, check for a replacement part in your tent’s repair kit or contact the manufacturer. For joint issues, ensure all connections are secure and free from debris. Lubricate moving parts if necessary. If a pole is beyond repair, consider using a temporary splint or supporting the tent with additional stakes until a proper replacement is available. Always follow the manufacturer’s guidelines for repairs. Regularly inspect poles and joints for signs of wear, such as rust or fraying, and address them before they become critical issues. Proper maintenance and timely repairs will ensure your tent remains stable and secure in all conditions.

Additional Tips
Always read the manual before starting and keep it handy for reference. Regularly inspect your tent for wear and tear to ensure longevity. Store your tent in a dry, cool place to prevent mold and damage. Practice setting up your tent at home to build confidence and speed. Consider weather conditions and choose the right tent for your needs. Keep a repair kit on hand for unexpected issues. Follow all safety precautions to avoid accidents. By following these tips, you can enjoy a safe and comfortable camping experience every time. Proper care and maintenance will extend the life of your tent and ensure it performs well in various conditions. Always prioritize safety and preparedness when setting up your tent. Happy camping!
Tips for First-Time Tent Users
- Read the manual: Always start by reading the tent’s instruction manual to understand the setup process and components.
- Choose the right spot: Select a flat, dry area free from rocks and branches to ensure a stable base for your tent.
- Lay a tarp first: Place a tarp or footprint under your tent to protect it from moisture and abrasion.
- Unpack and organize: Unpack all components and organize them before starting assembly to avoid confusion.
- Handle poles carefully: Avoid snapping or bending poles; attach them to the frame gently but firmly.
- Stake securely: Use stakes to anchor the tent tightly, ensuring it can withstand wind and weather conditions.
- Check for tightness: Make sure the tent fabric is taut and all connections are secure to prevent sagging.
- Practice at home: If possible, practice setting up your tent at home before your camping trip.
- Keep a repair kit handy: Include a small kit with patches, tape, and extra stakes for unexpected repairs.
- Stay patient: Don’t rush the process; take your time to ensure everything is assembled correctly.
By following these tips, first-time tent users can enjoy a smooth and stress-free camping experience.
Seasonal Considerations for Tent Setup
Adapting your tent setup to the season is crucial for optimal performance and safety. In spring, ensure the ground is dry and use a tarp to protect against moisture. Summer setups benefit from shaded areas and proper ventilation to prevent overheating. Autumn requires clearing leaves and debris from the site, while winter demands sturdy poles and extra anchoring to withstand snow and wind. Always check weather forecasts and adjust your setup accordingly. For colder months, consider using snow stakes and ensuring the tent fabric is tightly secured; In rainy seasons, apply waterproofing sprays and ensure seams are sealed. Seasonal adjustments ensure your tent remains reliable and comfortable year-round.
Proper tent setup ensures safety, durability, and comfort. Always follow the manual, prepare the site, and secure the tent thoroughly. Happy camping with a well-installed shelter!
Final Checklist for Tent Setup
- Choose a level, debris-free site for installation.
- Lay a tarp to protect the tent from moisture and abrasion.
- Unpack and organize all tent components, ensuring nothing is missing.
- Attach poles to the frame securely, following the manual’s instructions.
- Install doors, windows, and any additional features like rainflies.
- Stake down the tent firmly, tightening ropes for stability.
- Double-check all connections and ensure the tent is evenly pitched.
- Verify the tent is watertight and free from leaks or tears.
- Ensure all accessories, like guy lines, are properly secured.
- Review the manual to confirm all setup steps are completed.
By following this checklist, you’ll ensure a safe and durable tent setup for any camping adventure.
Importance of Following Manufacturer Guidelines
Adhering to the manufacturer’s instructions is crucial for ensuring the tent’s safety, durability, and performance. Proper assembly, as outlined in the manual, prevents structural weakness and potential hazards like collapses or leaks.
- Safety: Manuals often include critical warnings, such as avoiding gas-powered appliances inside tents, to prevent accidents.
- Efficiency: Following guidelines ensures quick and correct setup, saving time and effort.
- Warranty: Deviating from instructions may void warranties, leaving you without support for repairs or replacements.
- Durability: Proper care and maintenance, as per the manual, extend the tent’s lifespan and prevent premature wear.
By adhering to the manufacturer’s guidelines, you ensure a secure, reliable, and enjoyable camping experience while preserving your investment in the tent. Always prioritize these instructions for optimal results.