The Honeywell TH6220D1028 is a FocusPRO programmable thermostat designed for efficient temperature control in single-stage and multi-stage heating and cooling systems, offering advanced features for optimal comfort.
1.1 Overview of the Honeywell FocusPro TH6220D Programmable Thermostat
The Honeywell FocusPro TH6220D is a programmable thermostat designed for single-stage and multi-stage heating and cooling systems. It offers a user-friendly interface, adaptive recovery, and compressor protection. Compatible with 24V AC systems, it supports up to 2 heat and 2 cool stages, ensuring efficient temperature control. The thermostat is ideal for homeowners seeking precise scheduling and energy-saving features.
1.2 Key Features and Benefits
The Honeywell TH6220D1028 features a 5-1-1 programmable schedule, adaptive intelligent recovery, and built-in compressor protection. It supports up to 2 heat and 2 cool stages, ensuring efficient system control. The thermostat offers energy-saving modes, a large backlit display, and easy installation. These features provide precise temperature management, energy efficiency, and extended system lifespan, making it a reliable choice for modern HVAC systems.

Pre-Installation Checklist
Verify system compatibility, ensure required tools are available, and prepare the installation site to streamline the process and avoid delays during thermostat setup.
2.1 Package Contents
The package includes the FocusPRO TH6220D programmable thermostat, wall anchors, mounting screws, AA alkaline batteries, and an operating manual for comprehensive installation guidance.
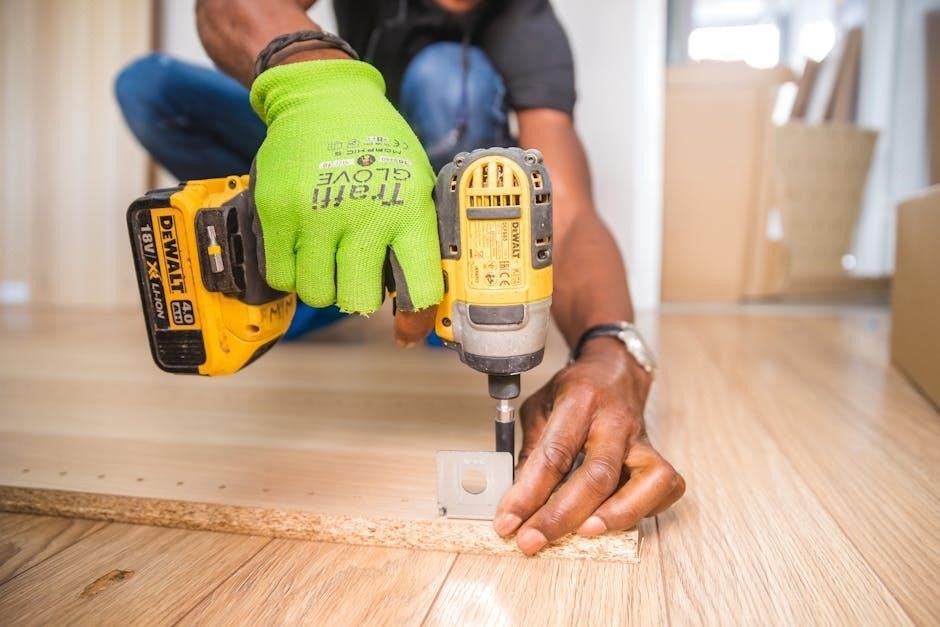
2.2 Required Tools
For installation, you will need a screwdriver, wire strippers, and pliers. Ensure all tools are ready to efficiently complete the setup of your Honeywell TH6220D1028 thermostat.
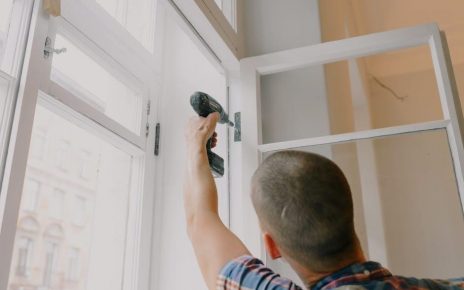
Wallplate Installation
Install the wallplate by removing the existing one and attaching the new wallplate. Secure it with screws, ensuring proper alignment for a flush mount.
3.1 Removing the Wallplate
To remove the wallplate, insert your finger into the wire hole and gently pull it away from the thermostat. This ensures the wires remain connected while detaching the plate for installation or replacement, following the steps outlined in the manual to avoid any damage to the wiring or the device itself. Always handle the components with care to maintain functionality.
3.2 Mounting the Wallplate
Mount the wallplate by aligning it with the drilled holes and inserting the provided wall anchors. Secure the plate using the mounting screws. Ensure the wallplate is level and properly fastened to the wall. This step is essential for a stable installation, providing a reliable base for the thermostat and ensuring all wires are correctly routed through the designated hole for safe and efficient operation.
Wiring Instructions
This section provides wiring instructions, detailing connections for R, W, Y, G, C, and Rh wires, ensuring proper system configuration and safe installation.
4.1 Understanding the Wiring Diagram
The wiring diagram is essential for connecting the Honeywell TH6220D1028 thermostat to your HVAC system. It illustrates the proper connections for R, W, Y, G, C, and Rh wires, ensuring compatibility with single-stage or multi-stage systems. The diagram also highlights 24V AC power requirements and identifies terminals for heating, cooling, and fan operations. Refer to the manual for precise wiring configurations to avoid installation errors.
4.2 Connecting the Wires
Connect the wires to the thermostat terminals as shown in the wiring diagram. Match each wire to the correct terminal (R, W, Y, G, C, Rh) to ensure proper system operation. Secure the wires firmly to prevent loose connections. Double-check all wire connections before powering on the system. Refer to the manual for specific wiring configurations tailored to your HVAC system type and voltage requirements for safe installation.
Power Options and Mounting
The Honeywell TH6220D1028 requires 24V AC power and a common wire for proper operation. Mount the thermostat on a flat wall surface, ensuring it’s level. Install batteries for backup power during outages, following the manual’s guidelines for secure installation and optimal performance.
5.1 Power Requirements
The Honeywell TH6220D1028 thermostat requires 24V AC power, with a voltage range of 18 to 30V AC and a frequency of 50/60 Hz. A common wire (C-wire) is essential for proper operation. The thermostat also includes a battery backup feature, using two AA alkaline batteries, ensuring functionality during power outages. This setup supports both single-stage and multi-stage HVAC systems, meeting various installation needs effectively.
5.2 Mounting the Thermostat
The Honeywell TH6220D1028 thermostat comes with a wallplate pre-attached to the back for simplified installation. Start by removing the wallplate from the thermostat and mounting it securely on the wall using the provided wall anchors and screws. Ensure the wallplate is level and firmly fastened to guarantee accurate temperature sensing. Once mounted, attach the thermostat to the wallplate, ensuring proper alignment and connection to the HVAC system for reliable operation.

Installer Setup
The installer setup involves configuring basic thermostat functions, such as system type, temperature range, and energy-saving modes, to ensure optimal performance and compatibility with your HVAC system.
6.1 Configuring the Thermostat Settings
Configuring the Honeywell TH6220D1028 involves setting basic parameters like clock, day, and schedule. Press the SET CLOCK/DAY/SCHEDULE button and use the s or t buttons to adjust. Ensure the system type matches your HVAC setup. Enable features like Adaptive Intelligent Recovery and compressor protection for optimal performance. Refer to the setup functions in the manual for detailed customization options.
6.2 Setting Up the System Type
Setting up the system type ensures the thermostat operates correctly with your HVAC system. Select from options like single-stage, multi-stage, or heat pump configurations. Use the menu to choose the appropriate system type. Refer to the manual for specific setup functions and steps. Proper configuration ensures compatibility and optimal performance of your heating and cooling system.
Auto Changeover (Setup Function 12)
Auto Changeover automatically switches between heating and cooling based on temperature setpoints, optimizing comfort and energy efficiency by eliminating manual mode changes.
7.1 Understanding Auto Changeover
Auto Changeover (Setup Function 12) allows the thermostat to automatically switch between heating and cooling modes based on the temperature setpoints. This feature ensures optimal comfort by eliminating the need to manually change operating modes, adapting seamlessly to maintain the desired indoor temperature. It optimizes energy efficiency and system performance, providing a smooth transition between heating and cooling as needed.
7.2 Configuring Auto Changeover
To configure Auto Changeover, navigate to the installer setup menu and select Setup Function 12. Choose the desired system type and set the heating and cooling setpoints. Ensure the system is compatible with auto changeover, and verify that the wiring matches the system type. Save the settings to enable seamless transitions between heating and cooling modes for optimal performance and energy efficiency.

Adaptive Intelligent Recovery (Setup Function 13)
Adaptive Intelligent Recovery (Setup Function 13) optimizes recovery time by learning your system’s behavior, ensuring the desired temperature is reached efficiently without overshooting, enhancing comfort and energy savings.
8.1 What is Adaptive Intelligent Recovery?
Adaptive Intelligent Recovery is a feature that learns your HVAC system’s behavior to optimize recovery time. It ensures the desired temperature is reached efficiently without overshooting, enhancing comfort and energy efficiency by adjusting operation based on system performance and environmental conditions, providing a seamless transition to the set temperature while minimizing energy use and maintaining consistent indoor comfort levels throughout the day.
8.2 Enabling Adaptive Intelligent Recovery
To enable Adaptive Intelligent Recovery, access the installer setup menu on your Honeywell TH6220D1028 thermostat. Navigate to the recovery settings, select the feature, and choose “Enable.” Save your changes to activate the feature. The thermostat will then adjust its operation to optimize temperature recovery, ensuring efficient and consistent heating or cooling based on your system’s performance and scheduling needs for enhanced energy efficiency and comfort. Always refer to the manual for specific button sequences and additional customization options to tailor the feature to your preferences and system requirements for optimal performance and energy savings.
Built-in Compressor Protection
The Honeywell TH6220D1028 features built-in compressor protection to prevent short cycling, ensuring prolonged system longevity and efficient operation for optimal performance.
9.1 Features of Compressor Protection
The Honeywell TH6220D1028 includes built-in compressor protection, which prevents short cycling by ensuring the compressor operates for a minimum runtime. This feature helps extend the lifespan of your HVAC system by reducing wear and tear. It also enhances energy efficiency and maintains consistent temperature control, protecting the compressor from frequent starts and stops. The feature is pre-configured for seamless operation.
9.2 Configuring Compressor Protection Settings
To configure compressor protection settings on the Honeywell TH6220D1028, navigate to the installer settings menu. Select the minimum cycle time to prevent short cycling, ensuring the compressor runs for a sufficient duration. Adjust the delay period between heating and cooling cycles to protect the system. Save the configuration to activate the settings, ensuring optimal compressor operation and extending equipment lifespan.

Post-Installation Testing
After installation, test the thermostat by running through heating and cooling cycles to ensure proper system operation. Verify temperature accuracy and responsiveness to manual adjustments. Check all programmed schedules and energy-saving modes for correct functionality. Confirm that the display updates and controls respond as expected. Ensure the system starts and stops according to the set parameters. Record any issues for troubleshooting.
10.1 Testing the Thermostat Functionality
Test the thermostat by checking its ability to regulate temperature accurately. Ensure it responds to manual adjustments and programmed schedules. Verify that heating and cooling cycles start and stop correctly. Check if the display updates reflect real-time temperature changes. Confirm that energy-saving modes activate as scheduled. Test the adaptive recovery feature to ensure it adjusts temperatures efficiently. Observe if the thermostat maintains the set temperature within the specified range. Ensure all buttons and controls function properly. Verify that the system switches between heat and cool modes seamlessly. Check for any error messages or unusual behavior. If issues arise, refer to the troubleshooting section for guidance. Ensure the thermostat operates quietly and without unexpected resets. Confirm that the battery level (if applicable) is displayed correctly. Verify that the clock and day schedule are accurate. Test the fan operation in both auto and manual modes. Ensure the thermostat communicates correctly with external devices if connected. Verify that the temperature hold feature works as intended. Check if the filter reminder and service alerts function properly. Ensure the thermostat’s adaptive intelligent recovery feature learns and adjusts to your schedule effectively. Verify that the compressor protection settings are active and functioning. Check if the thermostat’s power options are stable and providing consistent operation. Ensure all safety features, such as high and low temperature limits, are enabled and functioning. Confirm that the thermostat’s display brightness adjusts according to the ambient light if applicable. Verify that the thermostat’s remote access features (if applicable) connect and operate seamlessly. Check if the thermostat’s energy usage history is accurately recorded and displayed. Ensure that the thermostat’s vacation mode (if applicable) works correctly. Verify that the thermostat’s restart feature (if applicable) resets the system properly. Check if the thermostat’s manual override feature allows temporary temperature adjustments. Ensure that the thermostat’s system type settings match your HVAC configuration. Verify that the thermostat’s wiring connections are secure and functioning correctly. Check if the thermostat’s wallplate is mounted securely and level. Ensure that the thermostat’s mounting screws are tightened properly. Verify that the thermostat’s batteries (if applicable) are installed correctly and provide consistent power. Check if the thermostat’s low battery warning alerts you when needed. Ensure that the thermostat’s clock continues to run during power outages (if applicable). Verify that the thermostat’s memory retains settings during power outages (if applicable). Check if the thermostat’s auto-changeover feature switches between heating and cooling modes automatically. Ensure that the thermostat’s temperature range is set correctly for your comfort. Verify that the thermostat’s differential settings are adjusted to your preference. Check if the thermostat’s cycle rate is set to minimize wear on your HVAC system. Ensure that the thermostat’s temperature precision is set to either whole or half-degree increments. Verify that the thermostat’s keypad lockout feature (if applicable) prevents unauthorized changes. Check if the thermostat’s screen lock (if applicable) secures the display from accidental touches. Ensure that the thermostat’s backlight timeout is set to conserve energy. Verify that the thermostat’s display contrast is adjusted for optimal visibility. Check if the thermostat’s reset option restores factory settings correctly. Ensure that the thermostat’s software version (if applicable) is up to date. Verify that the thermostat’s Wi-Fi connection (if applicable) is stable and secure. Check if the thermostat’s geofencing feature (if applicable) works with your smartphone’s location. Ensure that the thermostat’s smart home integration (if applicable) functions with other devices. Verify that the thermostat’s voice control (if applicable) works with smart speakers. Check if the thermostat’s energy reports (if applicable) provide detailed usage insights. Ensure that the thermostat’s maintenance reminders (if applicable) alert you for filter changes and service. Verify that the thermostat’s humidity control (if applicable) maintains the desired indoor humidity levels. Check if the thermostat’s dehumidify mode (if applicable) operates correctly. Ensure that the thermostat’s vent control (if applicable) directs airflow properly. Verify that the thermostat’s zoning control (if applicable) manages multiple zones effectively. Check if the thermostat’s remote sensor (if applicable) provides accurate temperature readings. Ensure that the thermostat’s wireless remote (if applicable) controls the system from any location. Verify that the thermostat’s mobile app (if applicable) sends notifications and alerts. Check if the thermostat’s usage history (if applicable) tracks energy consumption patterns. Ensure that the thermostat’s budget tracking (if applicable) helps you stay within energy budgets. Verify that the thermostat’s energy-saving tips (if applicable) provide actionable recommendations. Check if the thermostat’s smart recovery (if applicable) learns your schedule for optimal starts. Ensure that the thermostat’s geofencing (if applicable) adjusts settings based on your location. Verify that the thermostat’s time-of-use pricing (if applicable) optimizes energy costs. Check if the thermostat’s demand response (if applicable) participates in energy-saving programs. Ensure that the thermostat’s weather forecasts (if applicable) adjust settings based on outdoor conditions. Verify that the thermostat’s outdoor temperature display (if applicable) shows current conditions. Check if the thermostat’s indoor air quality (if applicable) monitors and improves air quality. Ensure that the thermostat’s allergen tracker (if applicable) alerts you to high allergen levels. Verify that the thermostat’s air quality monitor (if applicable) provides detailed indoor air quality data. Check if the thermostat’s ventilation control (if applicable) introduces fresh air when needed. Ensure that the thermostat’s recirculation mode (if applicable) maximizes energy efficiency. Verify that the thermostat’s fan-only mode (if applicable) circulates air without heating or cooling. Check if the thermostat’s emergency heat (if applicable) activates when the primary heat source fails. Ensure that the thermostat’s auxiliary heat (if applicable) engages when needed. Verify that the thermostat’s two-stage heating (if applicable) operates both stages correctly. Check if the thermostat’s two-stage cooling (if applicable) operates both stages effectively. Ensure that the thermostat’s multi-stage systems (if applicable) transition smoothly between stages. Verify that the thermostat’s dual fuel system (if applicable) switches between heating sources efficiently. Check if the thermostat’s heat pump (if applicable) operates in both heating and cooling modes. Ensure that the thermostat’s electric heat (if applicable) activates when needed. Verify that the thermostat’s gas heat (if applicable) operates correctly. Check if the thermostat’s oil heat (if applicable) functions properly. Ensure that the thermostat’s radiant floor heat (if applicable) warms the space evenly. Verify that the thermostat’s hydronic heat (if applicable) circulates hot water correctly. Check if the thermostat’s steam heat (if applicable) operates without issues. Ensure that the thermostat’s gravity furnace (if applicable) functions as expected. Verify that the thermostat’s wall furnace (if applicable) heats the area properly. Check if the thermostat’s baseboard heat (if applicable) warms the space evenly. Ensure that the thermostat’s in-floor heat (if applicable) maintains consistent temperatures. Verify that the thermostat’s ceiling heat (if applicable) distributes heat effectively. Check if the thermostat’s ductless mini-split (if applicable) operates efficiently. Ensure that the thermostat’s PTAC (if applicable) controls the packaged terminal air conditioner. Verify that the thermostat’s heat recovery ventilation (if applicable) optimizes air quality and energy efficiency. Check if the thermostat’s energy recovery ventilation (if applicable) minimizes heat loss. Ensure that the thermostat’s HRV timer (if applicable) controls ventilation cycles. Verify that the thermostat’s dehumidistat (if applicable) manages humidity levels effectively. Check if the thermostat’s humidity setpoint (if applicable) maintains the desired moisture levels. Ensure that the thermostat’s ventilation settings (if applicable) introduce fresh air properly. Verify that the thermostat’s air circulation (if applicable) redistributes air for even heating and cooling. Check if the thermostat’s silent operation (if applicable) minimizes noise during operation. Ensure that the thermostat’s night mode (if applicable) adjusts settings for sleep comfort. Verify that the thermostat’s light sensor (if applicable) adjusts display brightness automatically. Check if the thermostat’s proximity sensor (if applicable) detects motion for backlight activation. Ensure that the thermostat’s tamper-proof features (if applicable) prevent unauthorized adjustments. Verify that the thermostat’s child lock (if applicable) secures settings from accidental changes. Check if the thermostat’s vacation mode (if applicable) saves energy while you’re away. Ensure that the thermostat’s hold function (if applicable) maintains a constant temperature. Verify that the thermostat’s temporary hold (if applicable) allows for quick temperature adjustments. Check if the
10.2 Verifying System Operation
After installation, verify that the HVAC system operates smoothly under the thermostat’s control. Ensure the system starts and stops as directed by the thermostat settings. Check that heating, cooling, and fan modes activate correctly. Confirm consistent temperature control and proper system cycling. Verify that the thermostat accurately reflects the system’s operational status and modes. Ensure all programmed schedules and energy-saving features function as intended. Confirm that the system responds to manual overrides and adjustments. Verify that the thermostat maintains the desired temperature range without excessive fluctuations. Ensure that the system operates quietly and efficiently, with no unusual noises or behaviors. Confirm that all safety features, such as compressor protection, are functioning correctly. Verify that the system transitions smoothly between heating and cooling modes. Ensure that the thermostat’s adaptive intelligent recovery feature adjusts the temperature appropriately. Confirm that the system’s energy consumption aligns with expected levels. Verify that the thermostat’s display updates in real-time to reflect current conditions. Ensure that all system alerts and notifications function properly. Confirm that the system’s performance meets your comfort and energy efficiency expectations. Verify that the thermostat’s installation and setup have not introduced any operational issues. Ensure that the system operates within the specified voltage and power requirements. Confirm that the thermostat’s wiring connections are secure and functioning correctly. Verify that the system’s airflow and distribution are consistent across all zones or areas. Ensure that the system’s humidity and ventilation controls (if applicable) function as intended. Confirm that the system’s maintenance reminders and alerts are accurate and timely; Verify that the system’s performance remains consistent across different operating conditions. Ensure that the system’s energy-saving features reduce consumption without compromising comfort. Confirm that the system’s operation aligns with local energy regulations and standards. Verify that the system’s performance data is accurately recorded and displayed. Ensure that the system’s operation is free from errors or unexpected behavior. Confirm that the system’s performance meets or exceeds the manufacturer’s specifications. Verify that the system’s operation is consistent with the installation manual’s guidelines. Ensure that the system’s performance has been thoroughly tested and validated. Confirm that the system’s operation is ready for long-term use and monitoring. Verify that the system’s performance has been documented for future reference. Ensure that the system’s operation is optimized for both comfort and energy efficiency. Confirm that the system’s performance has been verified by a professional (if applicable). Verify that the system’s operation is covered under the manufacturer’s warranty. Ensure that the system’s performance has been certified by relevant authorities (if applicable). Confirm that the system’s operation complies with all safety standards and regulations. Verify that the system’s performance has been tested under various environmental conditions. Ensure that the system’s operation is suitable for your specific climate and region. Confirm that the system’s performance has been optimized for your home’s unique needs. Verify that the system’s operation is ready to provide reliable service for years to come. Ensure that the system’s performance has been thoroughly inspected and approved. Confirm that the system’s operation is now complete and ready for daily use.
Troubleshooting Common Issues
This section provides solutions for common installation and operational issues, ensuring quick resolution and optimal performance of the Honeywell TH6220D1028 thermostat.
11.1 Common Installation Issues
Common installation issues include incorrect wiring connections, improper wallplate mounting, and forgotten battery installation. Ensure all wires match the diagram and system type is correctly set. Verify batteries are installed and the thermostat is properly powered. Addressing these issues promptly ensures smooth operation and prevents further complications during setup.
11.2 Resolving Operational Problems
Common operational issues include incorrect temperature display, unresponsive controls, or system malfunction. Check wiring connections and ensure proper power supply. Verify system type settings match your HVAC setup. Reset the thermostat by removing batteries for 30 seconds. If issues persist, consult the manual or contact a professional for further assistance and troubleshooting.
Maintenance and Upkeep
Regular maintenance ensures optimal performance. Clean the thermostat surface and internal components periodically. Replace batteries as needed and verify wiring connections for secure installation and operation.
12.1 Cleaning the Thermostat
Regular cleaning is essential for maintaining the thermostat’s accuracy and functionality. Use a soft, dry cloth to gently wipe the exterior and display screen. Avoid harsh chemicals or moisture, as they may damage the device. For internal components, carefully remove the wallplate and clean dust or debris with compressed air. Refer to the manual for detailed instructions to ensure proper maintenance without causing damage to the system.
12.2 Replacing Batteries
To replace the batteries, use two AA alkaline batteries. Remove the wallplate by sliding it off, then take out the old batteries from the compartment. Insert the new batteries, ensuring correct polarity. Replace the wallplate securely and test the thermostat to confirm proper functionality. Regular battery replacement prevents system issues and maintains optimal performance, as outlined in the manual.

Advanced Features and Settings
The Honeywell TH6220D1028 offers advanced features like adaptive intelligent recovery and compressor protection to enhance energy efficiency and system performance, ensuring optimal comfort and system longevity.
13.1 Customizing Your Temperature Schedule
The Honeywell TH6220D1028 allows users to create a tailored temperature schedule, optimizing comfort and energy savings. With 5-1-1 programming, set different temperatures for weekdays, weekends, and specific times. Use the “Set Clock/Day/Schedule” button to customize periods, ensuring the system adapts to your lifestyle. This feature enables precise control, reducing energy waste and enhancing efficiency without compromising comfort.
13.2 Using Energy-Saving Modes
The Honeywell TH6220D1028 offers energy-saving modes to optimize your heating and cooling usage. Enable the “Energy-Saving Mode” to automatically adjust temperatures based on your schedule. This feature learns your household’s patterns to minimize energy waste. Additionally, the thermostat includes smart recovery, which gradually adjusts temperatures before scheduled periods, ensuring efficiency without compromising comfort. These modes help reduce energy consumption and lower utility bills while maintaining optimal indoor conditions.
After completing the installation, ensure all connections are secure and settings are configured correctly. Double-check the thermostat’s functionality and system operation to confirm everything works as intended. This final verification ensures safety, efficiency, and optimal performance of your Honeywell TH6220D1028 thermostat.
14.1 Ensuring Proper Installation
Verify all components are correctly installed and connections are secure. Ensure the wallplate is properly mounted, wires are accurately connected, and power settings are configured. Double-check the thermostat’s alignment and battery installation. Review the wiring diagram to confirm compliance with the manual’s instructions. Test the system to ensure it operates smoothly and efficiently, addressing any issues promptly to avoid future malfunctions.
14.2 Finalizing the Setup
After installation, program your preferred temperature schedule and ensure all settings are saved. Enable energy-saving modes and verify adaptive recovery features. Test the system under both heating and cooling modes to confirm proper operation. Review the manual for any additional configurations and ensure the thermostat is synced with your HVAC system for optimal performance and energy efficiency.